Article/Tutorial |
Change SAP Image |
Support |
|
Contributor |
|
Steps to change the default SAP IMAGE on the right hand column of the screen :-
•transaction code – SMW0
•x – Binary data for WebRFC applications
•Hit Enter
•Click Execute
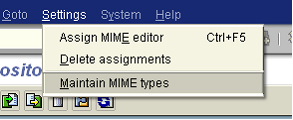
•Click Settings -> Maintain MIME types
•Click the create button
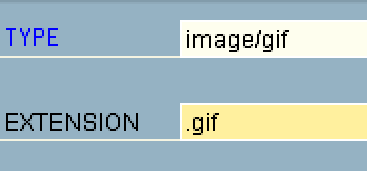
•Fill in :- Type : image/gif Extension : .gif
•Click save
•Click back to the binary data for WebRFC
•Click Create
•Fill in : -Obj. name : ZXXXX.GIF Description : .JPG, .BMP
•Company Logo
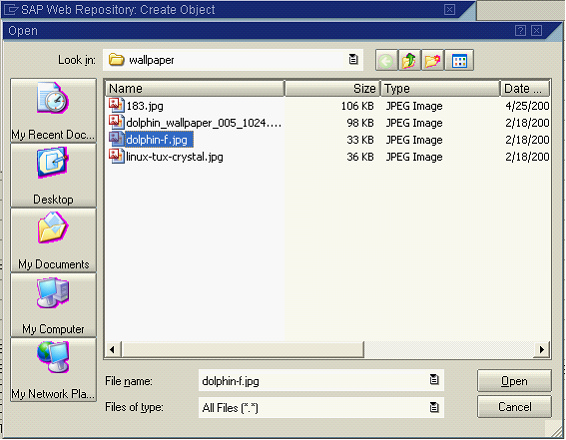
•Click Import and specify the filename whre your Gif file is located. File type is BIN. Finish press the Transfer button.
•If successful, your logo will be shown in the binary data for WebRFC.
•Trransaction code SM30 – Table/View – SSM_CUST
•Click Maintain
•Click New Entries
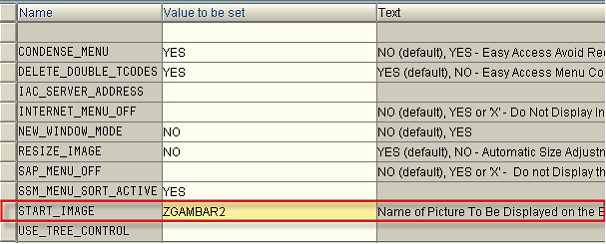
•Name Value to be set
•START_IMAGE ZXXXX.GIF ZIDESSTART
•RESIZE_IMAGE NO
•Logoff and Login again
Berikut Langkah-langkahnya.
1.Jalankan tcode SMW0
2.Klik tanda centang atau tekan ENTER.
3.Klik 4.Klik tombol
5.Klik tombol create 6.Masukan informasi di bawah.
7.Klik tombol 8.Klik
9.Klik tombol create 10.Masukan informasi seperti di bawah.
11.Klik tombol import yang berwarna hijau.
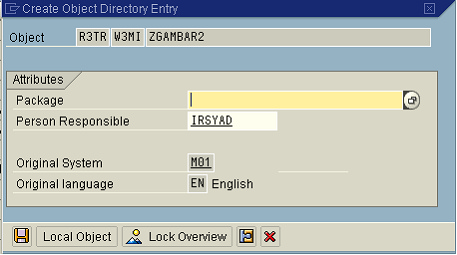
12.Klik tombol ’Local Object’.
13.gambar yang anda import ( ZGAMBAR2 ) sudah disimpan. 14.Kemudian jalankan tcode SM30 seperti di bawah.
15.Klik tanda centang atau tekan ENTER. 16.Masukan SSM_CUST pada ‘Table/View’.
17.Klik tombol 18.Kemudian tekan tombol 19.Masukan informasi berikut ini ( dengan huruf besar )
20.Kemudian klik tombol 21.Maka akan muncul permintaan request number, jika sudah memiliki request number klik
22.Tekan tanda centang.
23.Kemudian log off dan login kembali. 24.Sekarang gambar di halaman utama sudah berubah J
|