Objective |
Install Windows in Microsoft VirtualPC |
Support |
We only support our donators. |
Contributor |
Albertus Reinandang ( reinandang@yahoo.com ) Dadan Ridwan ( dadanridwan@yahoo.com ) |
Requirement
All step is already tested using this requirement
1.CD or ISO Windows Installation (Recommended : Windows XP Pro or Windows Advanced Server 2000)
2.Microsoft VirtualPC (download)
3.Basic knowledge about Microsoft VirtualPC installation and configuration
Installation
1.Add new Virtual Mechine, with this setting
Setting |
Value |
Others |
Memory |
1024 MB |
- |
Hard Disk 1 |
15 GB |
Dynamically expanding |
Hard Disk 2 |
4,3 GB |
Dynamically expanding |
Hard Disk 3 |
80 GB |
Dynamically expanding |
|

Notes : Virtual hardisk file must be place in the same directory with VMC file.
2.Click "![]() ", to run VirtualPC and begin install Windows
", to run VirtualPC and begin install Windows
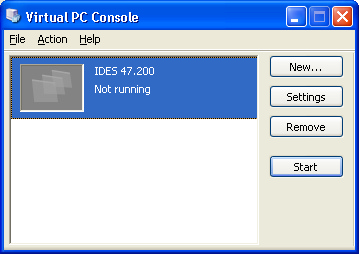
3.Select Windows installation source

If you have ISO image, then select Capture ISO Image.
4.Continued windows installation (find more)
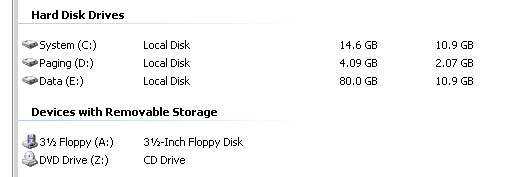
5.Format Hard Disk 2 and Hard Disk 3
6.Open "Performance Options"
System Properties > Advanced > Performance Setting)
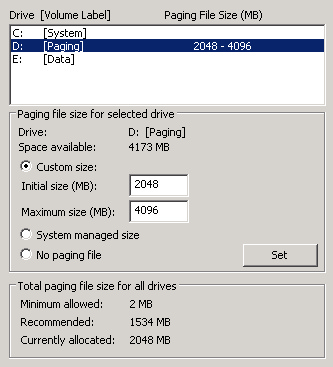
7.Change Virtual memory
Advanced > Virtual memory > change
8.Set virtual memory, follow the configuration like this image bellow
9.Change Computer name, example : mil-ides
System Properties > Computer name > change

10.Restart Windows
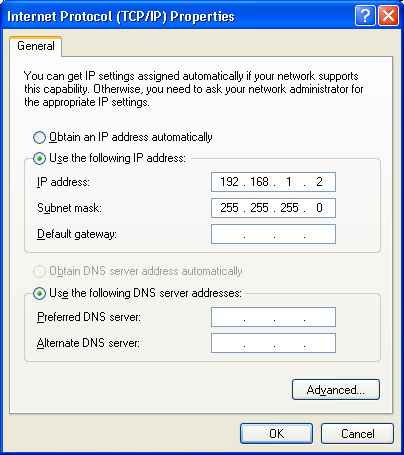
11.Sett IP Address
12.Add new string "<IP Address> <hostname>" in "C:\WINDOWS\system32\drivers\etc\hosts"

Notes : You must ended the string at hosts file with enter.
13.Restart your computer again
14.Finished